maytag gemini double oven manual
Maytag Gemini Double Oven Manual: A Comprehensive Guide
This manual provides essential guidance for Maytag Gemini owners, covering features, operation, troubleshooting, and maintenance—ensuring optimal performance and longevity of your appliance.
Understanding Your Maytag Gemini
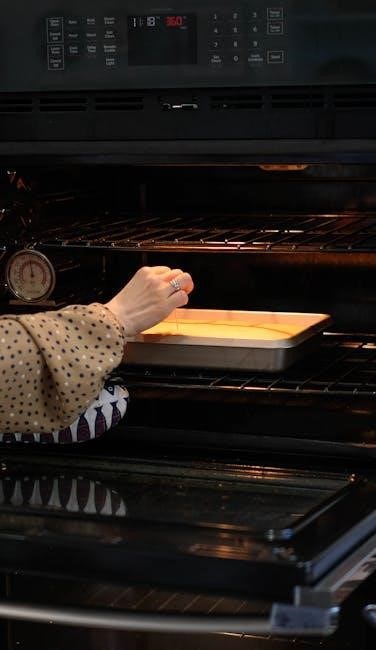
The Maytag Gemini double oven represents a significant advancement in home cooking convenience, offering two separate oven cavities for simultaneous meal preparation. Available in gas and electric models, including convection and coiltop configurations like the MER6870A and MER6550A, it caters to diverse culinary needs.
Understanding its unique features—such as the ability to operate both ovens independently or in combination—is key to maximizing its potential. Models like the MGR6875ADS boast varied burner outputs for precise cooking control. Familiarizing yourself with these capabilities, alongside proper safety precautions, will ensure a rewarding and efficient cooking experience with your Maytag Gemini.
Model Number Identification
Accurate model number identification is crucial for accessing the correct documentation, parts, and support resources for your Maytag Gemini double oven. Common models include MGR5750ADW, MGR5729ADW, MER5770AAW, and MER5730AAW. The model number, often found behind the control panel (as with the 2001 models), uniquely identifies your specific appliance configuration.
It’s essential when searching for replacement parts – like sensors and thermistors – or consulting online resources such as Repair Clinic. Verify the number before ordering or seeking assistance. Knowing your model ensures compatibility and avoids delays. The UPC for some models is 719881143743, but the model number is the primary identifier.
Locating the Model and Serial Number
Finding your Maytag Gemini’s model and serial number is a vital first step for service, repairs, or obtaining a replacement manual. For models dating back to 2001, the location is consistently behind the control panel. Carefully remove the panel – typically secured with screws or clips – to reveal the identification tag.
Both numbers are printed on this tag. The model number specifies the appliance’s features, while the serial number tracks its manufacturing date and history. Keep these numbers readily available when contacting customer service or ordering parts. Accurate identification streamlines the process and ensures you receive the correct assistance.
Genuine OEM Parts Availability
Genuine Original Equipment Manufacturer (OEM) parts for your Maytag Gemini double oven are readily available, ensuring optimal performance and maintaining the appliance’s integrity. Suppliers offer fast shipping, sometimes even same-day delivery, for critical components like sensors and thermistors. A wide range of models are supported, including MGR5750ADW, MGR5729ADW, MER5770AAW, and many others.
To guarantee the correct part, always refine your search using your specific model number. Reputable parts retailers, like Repair Clinic, provide validation tools and extensive catalogs. Utilizing genuine OEM parts safeguards your oven’s warranty and ensures a perfect fit and function, avoiding compatibility issues.
Same-Day Shipping and Returns
For urgent repairs, many suppliers of Maytag Gemini double oven parts offer same-day shipping on in-stock items, minimizing downtime and getting your oven back in operation quickly. This expedited service is crucial for essential components like oven sensors and thermistors. A generous 365-day return policy provides peace of mind, allowing you to return incorrect or unsuitable parts without hassle.
Confirm shipping cut-off times and return eligibility before ordering. Reputable retailers prioritize customer satisfaction with straightforward return processes and dedicated customer support. This commitment ensures a smooth experience when sourcing replacement parts for your Maytag Gemini.
Oven Features and Functions
Explore the Gemini’s diverse configurations, including convection options and coiltop versus standard models, alongside optimal oven rack arrangements for versatile cooking.
Gemini Double Oven Configurations
The Maytag Gemini double oven presents several configurations to suit diverse culinary needs. Models like the MER6870A offer convection cooking, while the MER6550A is available as a coiltop option, often in White or Bisque finishes. The MER5870A provides a standard convection experience, and the MES5870A is another convection variant.
Notably, all Gemini models consistently include three oven racks, maximizing cooking capacity and flexibility. Understanding these variations—convection versus coiltop, and available colors—is crucial for selecting the model best aligned with your kitchen and cooking preferences. These configurations aim to deliver efficient and versatile performance for everyday meals and elaborate feasts alike.
Convection Cooking Options
Maytag Gemini double ovens frequently feature convection cooking, enhancing baking and roasting results. Convection utilizes a fan to circulate hot air, ensuring even heat distribution throughout the oven cavity. Models like the MER6870A and MER5870A specifically highlight convection capabilities. This technology reduces cooking times and promotes consistent browning, ideal for multiple racks of cookies or a perfectly roasted turkey.
The benefits extend to more even cooking, minimizing hot spots and delivering superior texture. Understanding convection settings—whether true convection or conventional with fan assist—is key to maximizing its potential. Experimenting with convection can elevate your culinary creations, offering professional-quality results at home.
Coiltop vs. Standard Models
Maytag Gemini ranges were available in both coiltop and standard (smooth top) configurations. The MER6550A is specifically noted as a coiltop model, often offered in white or bisque finishes. Coiltop models utilize electric coils for heating, while standard models feature a smooth glass cooktop with heating elements beneath.
Coiltops generally offer faster heating and are often more affordable, but can be more challenging to clean. Standard models provide a sleek aesthetic and easier cleanup, though they may heat slightly slower. Understanding the differences helps users choose a model aligning with their cooking style and preferences. Both configurations maintain the Gemini’s double oven functionality.
Oven Rack Arrangement
The Maytag Gemini double oven typically comes equipped with three oven racks, providing flexibility for cooking multiple dishes simultaneously. Proper rack placement is crucial for optimal cooking results. For convection models like MER6870A, positioning racks according to recipe guidelines ensures even heat circulation.
Generally, the middle rack is best for most baking and roasting, while the top rack is suitable for broiling or finishing dishes. The bottom rack is ideal for casseroles or items requiring less direct heat. Adjust rack positions based on the size and number of items being cooked, allowing for adequate airflow around each dish.

Operating Instructions
Mastering your Maytag Gemini is simple! This section details the control panel, temperature settings, timer functions, and preheating procedures for efficient cooking.
Control Panel Overview
The Maytag Gemini’s control panel is designed for intuitive operation. It typically features separate controls for the upper and lower oven cavities, allowing independent temperature and function settings. Digital displays clearly show the set temperature, cooking time, and oven mode. Common buttons include Bake, Broil, Convection Bake, Convection Roast, and a Timer function.
Look for options to adjust cook settings, delay start, and control oven lights. Some models include a number pad for precise time entry. Familiarize yourself with the panel’s layout to easily navigate its features. Understanding these controls is key to unlocking the full potential of your Gemini double oven, ensuring consistent and delicious results every time you cook.
Setting Oven Temperature
To set the oven temperature on your Maytag Gemini, first select the desired oven – upper or lower – using the corresponding control. Then, use the up and down arrow buttons (or the number pad on some models) to adjust the temperature to your recipe’s specification. The digital display will show the set temperature.
For precise cooking, ensure the oven is properly preheated before placing food inside. Some models offer a “Preheat” function that automatically brings the oven to the selected temperature. Remember to consult your recipe for the recommended temperature and adjust accordingly. Accurate temperature setting is crucial for optimal cooking results.
Using the Timer Function
The Maytag Gemini’s timer function offers versatile options for convenient cooking. To set a cooking time, press the “Timer” button, then use the number pad to input the desired duration in minutes and seconds. Press “Start” to activate the timer. The display will count down, and an audible alarm will sound when the time expires.
You can also use the “Delay Start” feature to program the oven to begin cooking at a later time. This is ideal for meal preparation. The timer can operate independently of the oven, allowing you to time other kitchen tasks. Always double-check the timer settings before initiating.
Preheating the Oven
Proper preheating is crucial for consistent and accurate cooking results with your Maytag Gemini double oven. To preheat, select your desired temperature using the control panel. Press the “Bake” or “Convection Bake” button, depending on your recipe requirements. The oven will automatically begin heating, and the display will indicate “Preheating.”
Allow sufficient time for the oven to reach the set temperature – typically 10-15 minutes. A signal will indicate when preheating is complete. Avoid opening the oven door during preheating, as this can significantly prolong the process and affect temperature accuracy. Always refer to your recipe for specific preheating instructions.

Troubleshooting Common Issues
This section details solutions for typical Maytag Gemini problems—from heating failures and temperature inaccuracies to control panel errors and deciphering error codes.
Oven Not Heating
If your Maytag Gemini oven isn’t heating, several factors could be at play. First, verify the power supply – ensure the oven is properly plugged in and the circuit breaker hasn’t tripped. Check the control panel settings; a locked control or incorrect temperature setting can prevent heating. A faulty oven sensor or igniter (for gas models) are common culprits.
For electric ovens, a failed heating element is a likely cause. Gas ovens may have a malfunctioning gas valve. Before attempting any repairs, disconnect power. If you’re uncomfortable diagnosing or repairing these issues, consult a qualified appliance technician. Always refer to your model number when seeking assistance or replacement parts, as components vary between Gemini configurations;
Temperature Inaccuracies
Experiencing temperature discrepancies with your Maytag Gemini? This often stems from a faulty oven temperature sensor (thermistor). This sensor relays temperature information to the control board; if inaccurate, the oven won’t maintain the set temperature. Calibration issues within the control board itself can also contribute to this problem.
Ensure oven racks aren’t obstructing airflow, as this can cause uneven heating. Verify the door seals are intact, preventing heat loss; If the issue persists, testing the sensor with a multimeter is recommended (consult a technician if unfamiliar). Always use your specific model number when ordering a replacement sensor for optimal compatibility and accurate temperature regulation.
Control Panel Malfunctions
A malfunctioning control panel on your Maytag Gemini can manifest in several ways: unresponsive buttons, erratic display readings, or complete power loss. Often, this points to a faulty control board, the “brain” of the oven. Electrical surges or moisture damage are common culprits. Before assuming a board failure, check the power cord and circuit breaker.
Inspect the membrane switch panel for damage, as worn buttons can cause intermittent connectivity. If the display is blank, a fuse within the control panel might be blown. Replacing the control board typically requires professional assistance due to its complexity and electrical safety concerns. Always reference your model number when sourcing a replacement.
Error Codes and Meanings
Maytag Gemini ovens utilize error codes to diagnose internal issues. These codes appear on the control panel display, signaling a problem requiring attention. While specific codes vary by model (MGR5750ADW, MER5770AAW, etc.), common errors include F0 E1 (temperature sensor failure), F2 E2 (ignition failure – gas models), and F9 E9 (communication error).
Consult your specific model’s documentation or the Maytag website for a comprehensive list and troubleshooting steps. Ignoring error codes can lead to further damage or unsafe operation. Some codes may indicate a simple fix, like a loose wire, while others necessitate professional repair. Always disconnect power before attempting any internal inspection.

Maintenance and Care
Regular cleaning and upkeep are vital for your Maytag Gemini. This includes interior and cooktop cleaning, bulb replacement, and utilizing the self-cleaning cycle.
Cleaning the Oven Interior
Maintaining a clean oven interior ensures efficient cooking and prevents unpleasant odors. For regular cleaning, allow the oven to cool completely before wiping down surfaces with a damp cloth and mild detergent. Avoid abrasive cleaners, as they can damage the enamel coating.
For baked-on spills, create a paste of baking soda and water, apply it to the affected areas, and let it sit for several hours or overnight. Then, scrub gently and rinse thoroughly. The self-cleaning cycle, when used correctly, offers a convenient deep-cleaning option.
Remember to remove oven racks and any cookware before initiating the self-clean cycle. Ensure proper ventilation during the self-cleaning process, as it can produce some smoke and odor. Always consult the full manual for detailed self-cleaning instructions and safety precautions.
Cleaning the Cooktop
Regular cooktop cleaning is crucial for maintaining its appearance and functionality. After each use, allow the cooktop to cool completely before wiping it down with a damp cloth and mild dish soap. For stubborn spills or burnt-on food, a cooktop scraper can be used carefully to avoid scratching the surface.
Avoid abrasive cleaners or scouring pads, especially on glass or ceramic cooktops, as these can cause permanent damage. Specialized cooktop cleaners are available for more thorough cleaning and polishing.
Ensure all cleaning solutions are thoroughly rinsed away to prevent residue buildup. For coil-top models, gently lift and clean beneath the coils to remove any accumulated debris. Always refer to the complete manual for specific cleaning recommendations based on your cooktop type.

Replacing Oven Bulbs
To replace an oven bulb, always disconnect the power to the oven at the circuit breaker to prevent electrical shock. Locate the bulb access panel, typically at the back of the oven interior. Remove the panel cover, often secured with screws, and carefully unscrew the old bulb.
Use a dry cloth or glove to handle the new bulb, avoiding direct contact with the glass. Install the new bulb, ensuring it’s securely tightened but not over-tightened. Replace the access panel cover and restore power to the oven.
Refer to your model’s specific manual for bulb type and wattage recommendations. If you encounter difficulties, consult a qualified appliance repair technician.
Self-Cleaning Cycle Instructions
Before initiating the self-cleaning cycle, remove oven racks, cookware, and any loose debris. Ensure the oven door can fully close and latch securely. Select the self-clean cycle on the control panel, choosing the desired cleaning duration—typically ranging from 2 to 4 hours.
The oven door will automatically lock during the cycle, remaining locked until the oven cools sufficiently. Avoid opening the door manually during operation. A burning odor is normal during self-cleaning, so ensure adequate ventilation.
Once cooled, wipe away any remaining ash with a damp cloth. Refer to your model’s manual for specific self-clean cycle instructions and safety precautions.

Safety Precautions
Prioritize safety by following all guidelines; ensure proper gas/electrical connections, use child safety locks, and maintain adequate ventilation during oven operation.
Gas Oven Safety
When operating your Maytag Gemini gas oven, several crucial safety precautions must be observed. Always ensure proper ventilation to prevent the buildup of carbon monoxide, a potentially deadly gas. Regularly inspect the gas supply line for any leaks or damage, and if you smell gas, immediately shut off the gas supply and contact your local gas company or a qualified technician.
Never attempt to repair or modify the gas oven yourself; this should only be done by a certified professional. Keep flammable materials away from the oven and burners. Be cautious when using aerosol sprays near the oven, as they can ignite. Familiarize yourself with the location of the gas shut-off valve for emergency situations. Proper installation and adherence to these guidelines are vital for safe operation.
Electrical Safety
Maintaining electrical safety with your Maytag Gemini double oven is paramount. Always ensure the oven is properly grounded to prevent electric shock. Never operate the oven with a damaged power cord or plug; replace them immediately. Avoid using extension cords or adapters, as they can overheat and pose a fire hazard.
Do not attempt to repair electrical components yourself; contact a qualified technician for any repairs. Keep the area around the oven dry to minimize the risk of electrical shock. Disconnect the oven from the power supply before cleaning or performing any maintenance. Regularly inspect the electrical connections for any signs of wear or damage. Following these precautions will ensure safe operation and prevent potential hazards.
Child Safety Locks
Prioritizing child safety is crucial when operating your Maytag Gemini double oven. Many models feature control panel locks to prevent accidental operation by children. Activate this feature to disable the oven controls, safeguarding against unintended heating or changes to settings.
Additionally, be mindful of the oven’s surface temperature, which can remain hot for a considerable time after use. Supervise children closely when the oven is in operation or recently used. Educate them about the dangers of touching hot surfaces. Regularly check the oven door for proper closure and latching. Implementing these measures creates a safer kitchen environment for your family.
Proper Ventilation
Maintaining adequate ventilation is essential for safe and efficient Maytag Gemini double oven operation, particularly with gas models. Ensure the kitchen has a functioning range hood that vents to the outside, removing combustion byproducts and excess moisture.
Never block or obstruct the oven’s ventilation openings. Proper airflow prevents the buildup of potentially harmful gases and helps regulate oven temperature. If you smell gas, immediately extinguish any open flames, evacuate the area, and contact your gas company. Regular inspection of the vent system ensures optimal performance and safety. Good ventilation contributes to a healthier cooking environment.