eureka orthos guide
Eureka Orthos, the third iteration in the Eureka series, presents a challenging and rewarding experience for players seeking unique content.
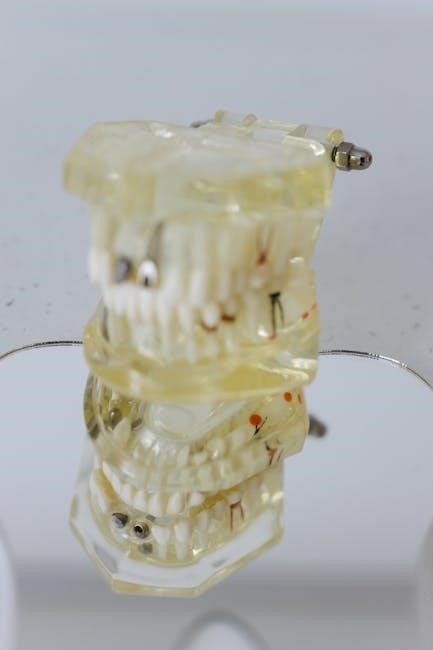
This comprehensive guide details over 150 monsters and bosses, offering detailed spell information for each encounter within Eureka Orthos.
Prepare for a deep dive into mechanics, progression, and strategies to conquer this new raid dungeon, similar to its predecessors.
What is Eureka Orthos?
Eureka Orthos represents the latest installment in the Eureka series of challenging, roguelike dungeons within Final Fantasy XIV. Building upon the foundations laid by the Palace of the Dead and Heaven-on-High, Orthos offers a unique and engaging experience for solo players. The core concept revolves around repeatedly ascending floors, battling monsters, and collecting powerful gear to enhance your character’s capabilities.
Unlike traditional dungeons, Eureka Orthos emphasizes individual skill and adaptability. Players navigate procedurally generated floors, encountering a diverse array of enemies and challenging encounters. Progression is tied to overcoming these obstacles and utilizing the buffs granted by defeating special enemies known as Dread Beasts. The dungeon is designed to be completed solo, encouraging players to master their chosen job and optimize their builds for survival and efficiency. It’s a test of both combat prowess and strategic decision-making, offering a compelling alternative to group content.
Differences from Previous Eureka Content (Palace of the Dead, Heaven-on-High)
While sharing core elements with the Palace of the Dead and Heaven-on-High, Eureka Orthos introduces several key distinctions. Notably, mobs in Orthos deal comparatively lower auto-attack damage, shifting the focus away from purely reactive kiting strategies favored by jobs like Machinist in previous iterations. The impact of “no item floors” – floors lacking item drops – is lessened for certain jobs, particularly Red Mage, due to its reliance on spells for both damage and survival.
Furthermore, floors without ability unlocks pose less of a hindrance to Red Mage, as its core functionality isn’t as dependent on specific abilities. The introduction of Dread Beasts and their unique, 30-minute buffs adds a new layer of strategic depth, encouraging players to actively seek out and defeat these challenging encounters. Overall, Orthos presents a slightly more forgiving, yet still demanding, experience compared to its predecessors.
Core Gameplay Loop & Progression
The core gameplay loop in Eureka Orthos revolves around ascending through increasingly difficult floors, defeating enemies, and overcoming challenging bosses. Players navigate randomized floor layouts, encountering Accursed Hordes – initially appearing as Bronze-tinged Sacks on floors 1-30 – and deceptive Mimics disguised as treasure chests. Progression hinges on efficiently clearing floors, managing resources like Orthos Potions, and strategically utilizing buffs gained from defeating Dread Beasts.
Each floor presents unique challenges, demanding adaptability and teamwork. Boss encounters, such as the Floor 10 boss, often require specific preparations, like maintaining Steel or consistent Orthos Potion uptime, to succeed. As players ascend beyond floor 30, the difficulty escalates, necessitating specialized builds and a deeper understanding of enemy mechanics.
Character Roles & Job Considerations
Eureka Orthos accommodates all roles, though viability varies. Melee DPS benefits from defensive tools, while Red Mage excels due to low auto-attack damage from mobs.
Melee DPS: Strengths and Weaknesses
Melee DPS classes in Eureka Orthos demonstrate a surprising degree of effectiveness, potentially being the easiest role to navigate due to inherent defensive capabilities. These classes benefit significantly from a robust toolkit of defensive maneuvers, including Bloodbath, Second Wind, Arms Length, Leg Sweep, Feint, and unique job-specific abilities.
This defensive layering allows melee DPS to withstand incoming damage, mitigating the need for constant kiting – a strategy more crucial for ranged physical DPS. Furthermore, the mobility afforded by these skills enables efficient positioning and engagement with enemies. Maintaining high damage output while benefiting from these defensive layers makes melee a strong contender;

However, melee DPS isn’t without its drawbacks. Positioning is paramount, requiring careful navigation of enemy attack patterns. Sustained damage output relies on consistent uptime, and certain encounters may necessitate precise timing to avoid debilitating attacks. Despite these challenges, the overall defensive advantage positions melee DPS favorably within Eureka Orthos.
Ranged Physical DPS: Machinists and Considerations
Machinists, as a ranged physical DPS option in Eureka Orthos, rely heavily on kiting and maintaining distance from enemies to maximize their effectiveness. However, a key observation suggests that mobs within Orthos exhibit comparatively low auto-attack damage. This diminishes the critical importance of Machinist’s strong kiting abilities, a core strength in other content.
The relative ease of survival due to lower enemy damage output impacts the role’s overall advantage. Furthermore, the presence of “no item floors” – floors where item effects are suppressed – can be particularly challenging. These floors typically hinder survival, but the reduced damage from mobs lessens this impact for Machinists.
Despite these considerations, Machinists still offer valuable ranged damage. Careful positioning and efficient use of their toolkit are crucial for success, even if their traditional strengths are somewhat mitigated by the unique characteristics of Eureka Orthos.
Magical DPS: Red Mage Advantages in Orthos
Red Mage emerges as a potentially superior choice for DPS within Eureka Orthos, exhibiting several advantages over other classes. The lower auto-attack damage dealt by mobs in Orthos reduces the necessity for kiting strategies, diminishing a key strength of jobs like Machinist. Red Mage’s damage and survivability are less reliant on itemization, making “no ability floors” less detrimental to their performance.
Crucially, Red Mage possesses Vercure, a powerful healing ability, providing self-sufficiency and reducing reliance on dedicated healers. This is particularly valuable in a solo or small-group environment. The reduced impact of “no ability floors” further solidifies Red Mage’s position, as most of their damage and survival stems from inherent magical spells.
Therefore, Red Mage’s blend of damage, self-healing, and resilience to floor-specific challenges makes it a strong contender for tackling Eureka Orthos.
Healer & Tank Roles: Viability and Strategies
While all roles demonstrate relative closeness in viability within Eureka Orthos, Melee roles arguably present the easiest experience. This stems from inherent role defensives – Bloodbath, Second Wind, Arms Length, Leg Sweep, Feint, and job-specific abilities – coupled with strong mobility while maintaining high damage output. These tools facilitate both survival and efficient monster engagement.
Healers and Tanks are certainly capable, but may require more specialized builds and strategic play. Effective healing necessitates careful mana management and prioritization of targets, while tanks must master positioning and mitigation to withstand sustained damage.
Success in these roles relies on understanding encounter mechanics and optimizing cooldown usage. Ultimately, a well-played Healer or Tank can contribute significantly to a party’s success in Eureka Orthos, though potentially with a steeper learning curve.
Essential Mechanics & Buffs
Eureka Orthos introduces Dread Beasts, granting 30-minute buffs upon defeat; Demi-Cochma provides a substantial defense increase. Mastering these encounters is crucial.
Dread Beasts: Identifying and Utilizing Buffs (e.g., Demi-Cochma Defense Buff)
Dread Beasts are unique encounters within Eureka Orthos, offering potent, 30-minute buffs upon successful completion. Identifying these creatures is paramount to maximizing your progression. Currently, information suggests at least four or five distinct Dread Beasts exist, each bestowing a different beneficial effect.
The Demi-Cochma is particularly noteworthy, granting a significant defense buff. This buff substantially increases survivability, proving invaluable during challenging floors and boss encounters. The recommended strategy for tackling these beasts involves initially pulling them into a manageable position.
Subsequently, utilizing a Protomander of Storms is highly effective, reducing the Dread Beast’s health to a minimal level. This allows for a swift and safe finishing blow, securing the valuable buff without excessive risk. Understanding and prioritizing these encounters is key to efficient Orthos exploration.
Accursed Horde Variations (Bronze-tinged Sack on Floors 1-30)
The Accursed Horde presents a recurring challenge throughout Eureka Orthos, manifesting in different forms depending on the floor range. During the initial progression, specifically floors 1 through 30, players will consistently encounter the Bronze-tinged Sack as the Accursed Horde variation.
These sacks represent a relatively manageable threat compared to later iterations, making the early floors more accessible. However, they still demand attention and efficient dispatching to avoid being overwhelmed. Understanding the specific form of the Accursed Horde on each floor set is crucial for strategic preparation;
As players ascend through Eureka Orthos, the Accursed Horde will evolve, presenting new challenges and requiring adjusted tactics. The Bronze-tinged Sack serves as a foundational encounter, establishing the core mechanics of dealing with these recurring enemies.
Mimic Encounters and Identification
Mimic encounters are a persistent hazard within Eureka Orthos, adding an element of unpredictability to exploration. These deceptive enemies disguise themselves as treasure chests, posing a significant threat to unsuspecting adventurers. Identifying Mimics before opening chests is paramount to survival and efficient progression.
On floors 1-30, Mimics can spawn from Bronze chests, requiring players to exercise caution when looting. While specific identification methods aren’t detailed, awareness and careful observation are key. Failing to recognize a Mimic results in a surprise attack, potentially disrupting party strategies.
Successfully identifying and defeating Mimics yields valuable rewards, making the risk worthwhile. Mastering the art of Mimic detection is a crucial skill for navigating the dangers of Eureka Orthos and maximizing loot acquisition.
Floor-Specific Challenges & Strategies
Eureka Orthos presents escalating challenges with each floor, demanding adaptable strategies. Early floors (1-30) are simpler, while later floors require specialized builds and teamwork.
Boss encounters, like the floor 10 boss, necessitate specific preparations, such as Steel or consistent Orthos Potion usage, for success.
Floors 1-30: Initial Progression and Boss Strategies
The initial thirty floors of Eureka Orthos offer a relatively accessible entry point, focusing on establishing a comfortable progression rhythm. These floors serve as an excellent opportunity to familiarize yourself with the core mechanics and build optimization. Expect the Accursed Horde to consistently manifest as a Bronze-tinged Sack, presenting a manageable threat.
Mimic encounters are prevalent, requiring vigilant observation to avoid unexpected setbacks. Identifying these deceptive foes is crucial for smooth advancement. Boss strategies on these early floors are generally straightforward, but demand consistent execution and awareness of enemy attack patterns.
However, the floor 10 boss presents a notable hurdle, demanding either the utilization of Steel or a reliable supply of Orthos Potions to maintain survivability. Prioritize consistent damage output and efficient resource management to overcome this challenge and continue your ascent through Eureka Orthos.
Floor 10 Boss: Steel or Orthos Potion Requirements

The boss encounter on Floor 10 of Eureka Orthos is a significant difficulty spike, largely due to its sustained damage output. Successfully navigating this fight hinges on mitigating that damage, and two primary methods emerge: utilizing Steel or maintaining consistent Orthos Potion uptime.
Steel provides a substantial defensive buff, significantly reducing incoming damage. However, its availability can be limited. Alternatively, frequent application of Orthos Potions offers a more readily accessible, though resource-intensive, solution.
Effective potion management is key; timing applications to coincide with predictable damage phases is crucial. Failing to consistently apply either Steel or Orthos Potions will likely result in swift defeat. Preparation and resourcefulness are paramount for conquering this challenging boss.
Later Floors (31+): Increased Difficulty and Specialized Builds
Beyond Floor 30, Eureka Orthos escalates dramatically in difficulty, demanding optimized gear, refined strategies, and often, highly specialized job builds. The Accursed Horde takes on more challenging forms, and enemy attack patterns become increasingly complex and punishing.
Generalist builds struggle to survive, necessitating a focus on maximizing damage output or survivability based on your chosen role. Understanding enemy weaknesses and exploiting them becomes critical for efficient progression;
Expect frequent encounters with powerful Dread Beasts, requiring strategic use of consumables like the Protomander of Storms. Mastering mechanics and adapting to unpredictable situations are essential for conquering the deeper levels of Orthos.

Key Items & Consumables
Orthos Potions are vital for survival, offering significant healing and mitigation. The Protomander of Storms is crucial for efficiently dealing with challenging Dread Beast encounters.
Orthos Potions: Usage and Importance
Orthos Potions are arguably the most critical consumable within Eureka Orthos, significantly impacting survivability, especially on higher floors. The floor 10 boss, in particular, practically demands consistent Orthos Potion usage or a substantial supply of Steel consumables to overcome its potent attacks.
Unlike other healing options, Orthos Potions provide a unique benefit: a substantial shield that absorbs incoming damage. This shield is invaluable for mitigating burst damage from bosses and challenging enemies. Strategic timing is key; use them before significant damage occurs, rather than reactively after taking a hit.
Efficient Orthos Potion management is a skill in itself. Players should prioritize conserving them for critical moments, such as boss phases or when facing particularly dangerous mechanics. Understanding encounter timings and anticipating damage spikes will maximize their effectiveness. Stockpiling is highly recommended, as running out can quickly lead to a party wipe.
Protomander of Storms: Utilizing for Dread Beast Encounters
Protomander of Storms becomes an essential tool when confronting the formidable Dread Beasts within Eureka Orthos. These encounters are often challenging, but a specific strategy utilizing this item dramatically simplifies the process.
The most effective method involves pulling the Dread Beast, then immediately deploying a Protomander of Storms. This will reduce the beast’s health to a mere 1 hit point, allowing for a swift and safe kill. This approach bypasses the need for prolonged, risky engagements.
This tactic is particularly valuable because Dread Beasts grant significant buffs upon defeat, lasting for 30 minutes. The Demi-Cochma, for example, provides a powerful defense buff. Utilizing the Protomander ensures you secure these buffs with minimal risk, optimizing your progression through Orthos.